Mashed Faux-Tatoes, Or, How Pho Girl Pulled a Folgers Commercial on Nacho Man

Around here, we don’t mess with Nacho Man’s spuds.

He likes them creamy and plentiful. And he especially likes that they’re potatoes.

But if you’re wondering what happened when I secretly replaced half his mashed potatoes with mashed cauliflower, the answer is…

Nothing.

He liked them. He said they were “Fine.”

That’s a compliment. It really is.

You see, Nacho Man has four phrases that he applies to any situation that requires him to give a response. Ask him a question, any question, and I can guarantee that three-fourths of the time he’ll say, “Fine,” “Pretty good,” “Not bad,” and “Alright.”

The other one-fourth of the time he doesn’t answer because he’s distracted and you have to repeat the question.

Now maybe I’m paranoid, but I don’t take “Not bad” and “Alright” at face value. Translation: “Bad” and “Meh.”

But “Fine” and “Pretty good” are green lights. So let’s proceed.

Preheat your oven to 350 degrees F. Take one good-sized head of cauliflower, cut the florets into large chunks, rinse and pat dry. Set them on a large cookie sheet and drizzle with olive oil. Bake until the cauliflower is fork tender and browned, about 25 or 30 minutes.

Meanwhile, peel, rinse, and dice 3 Yukon Gold potatoes, and boil until fork tender, about 7-10 minutes. Drain and mash.

Melt 1 tablespoon butter in a small saucepan on medium heat. Add 1/2-1 cup of milk and reduce heat to medium-low.

The best way to break up cauliflower is to spread rumors that you saw it cavorting with the beets in the crisper. If that doesn’t work, I like to use a food processor to pulse the cauliflower until it resembles very fine crumbs. An immersion blender works (just put the cauliflower into a deep bowl) but it doesn’t pulverize the cauliflower quite as well. If you need to, add a bit of liquid (potato water, milk, chicken stock, etc.) 1 teaspoon at a time  to the cauliflower to help break it down.

My favorite way to mash potatoes is the push them through a fine mesh sieve with the back of a wooden spoon. Use whatever method works for you, and combine the cauliflower and potatoes in a large bowl. Add the heated butter and milk mixture in small increments until you have a consistency you like. Season with salt and pepper.

This makes a lot. They’re great as leftovers. I also like to fry small patties in a little olive oil as a breakfast treat.

Roasted, Mashed Cauliflower and Potatoes

serves 4-6 with leftovers

Ingredients:

1 medium-large head of cauliflower, washed and cut

1 tablespoon extra-virgin olive oil

3 medium Yukon Gold potatoes

1 tablespoon butter (or more, if you like)

1/2-1 cup of milk

salt and pepper

Directions:

1. Preheat oven to 350 degrees F. Toss cauliflower pieces in 1 tablespoon of olive oil, then transfer to pan and bake until tops are nicely browned, about 25 – 30 minutes.

2. Peel and cut potatoes, and boil until fork tender (about 7-10 minutes on my stove). Drain.

3. Melt butter in small saucepan, add milk and warm on medium-low heat.

4. Puree cauliflower in food processor until they resemble a very fine crumb, and no large pieces remain. If needed, add liquid such as potato water, chicken stock, or milk, 1 teaspoon at a time to make the cauliflower smooth. Mash potatoes. (My favorite way to do this is by using a wooden spoon to push the potato through a fine sieve.)

5. Combine cauliflower and potatoes in a bowl. Add butter/milk mixture, 1/2 cup at a time, and stir gently until the consistency makes you happy. Season with salt and pepper.

Roasted Garlic Mashed Faux-Tatoes: roast a head of garlic, top cut off, with the cauliflower. Remove the garlic from the cloves add to the food processor.

Leave a comment

Filed under Uncategorized

Kale Chips, Or, Why Pho Girl Can’t Quit This Blog

This is my 100th post.

I’m writing about kale. Which I suppose is a bit like toasting your fiftieth anniversary with a mug of lukewarm green tea. Make that decaf green tea.

I haven’t blogged anything in about a month. Because when I am on the cusp of something significant, like a 100th blog post, I work myself into quite a state trying to think of something earth-shattering to share.

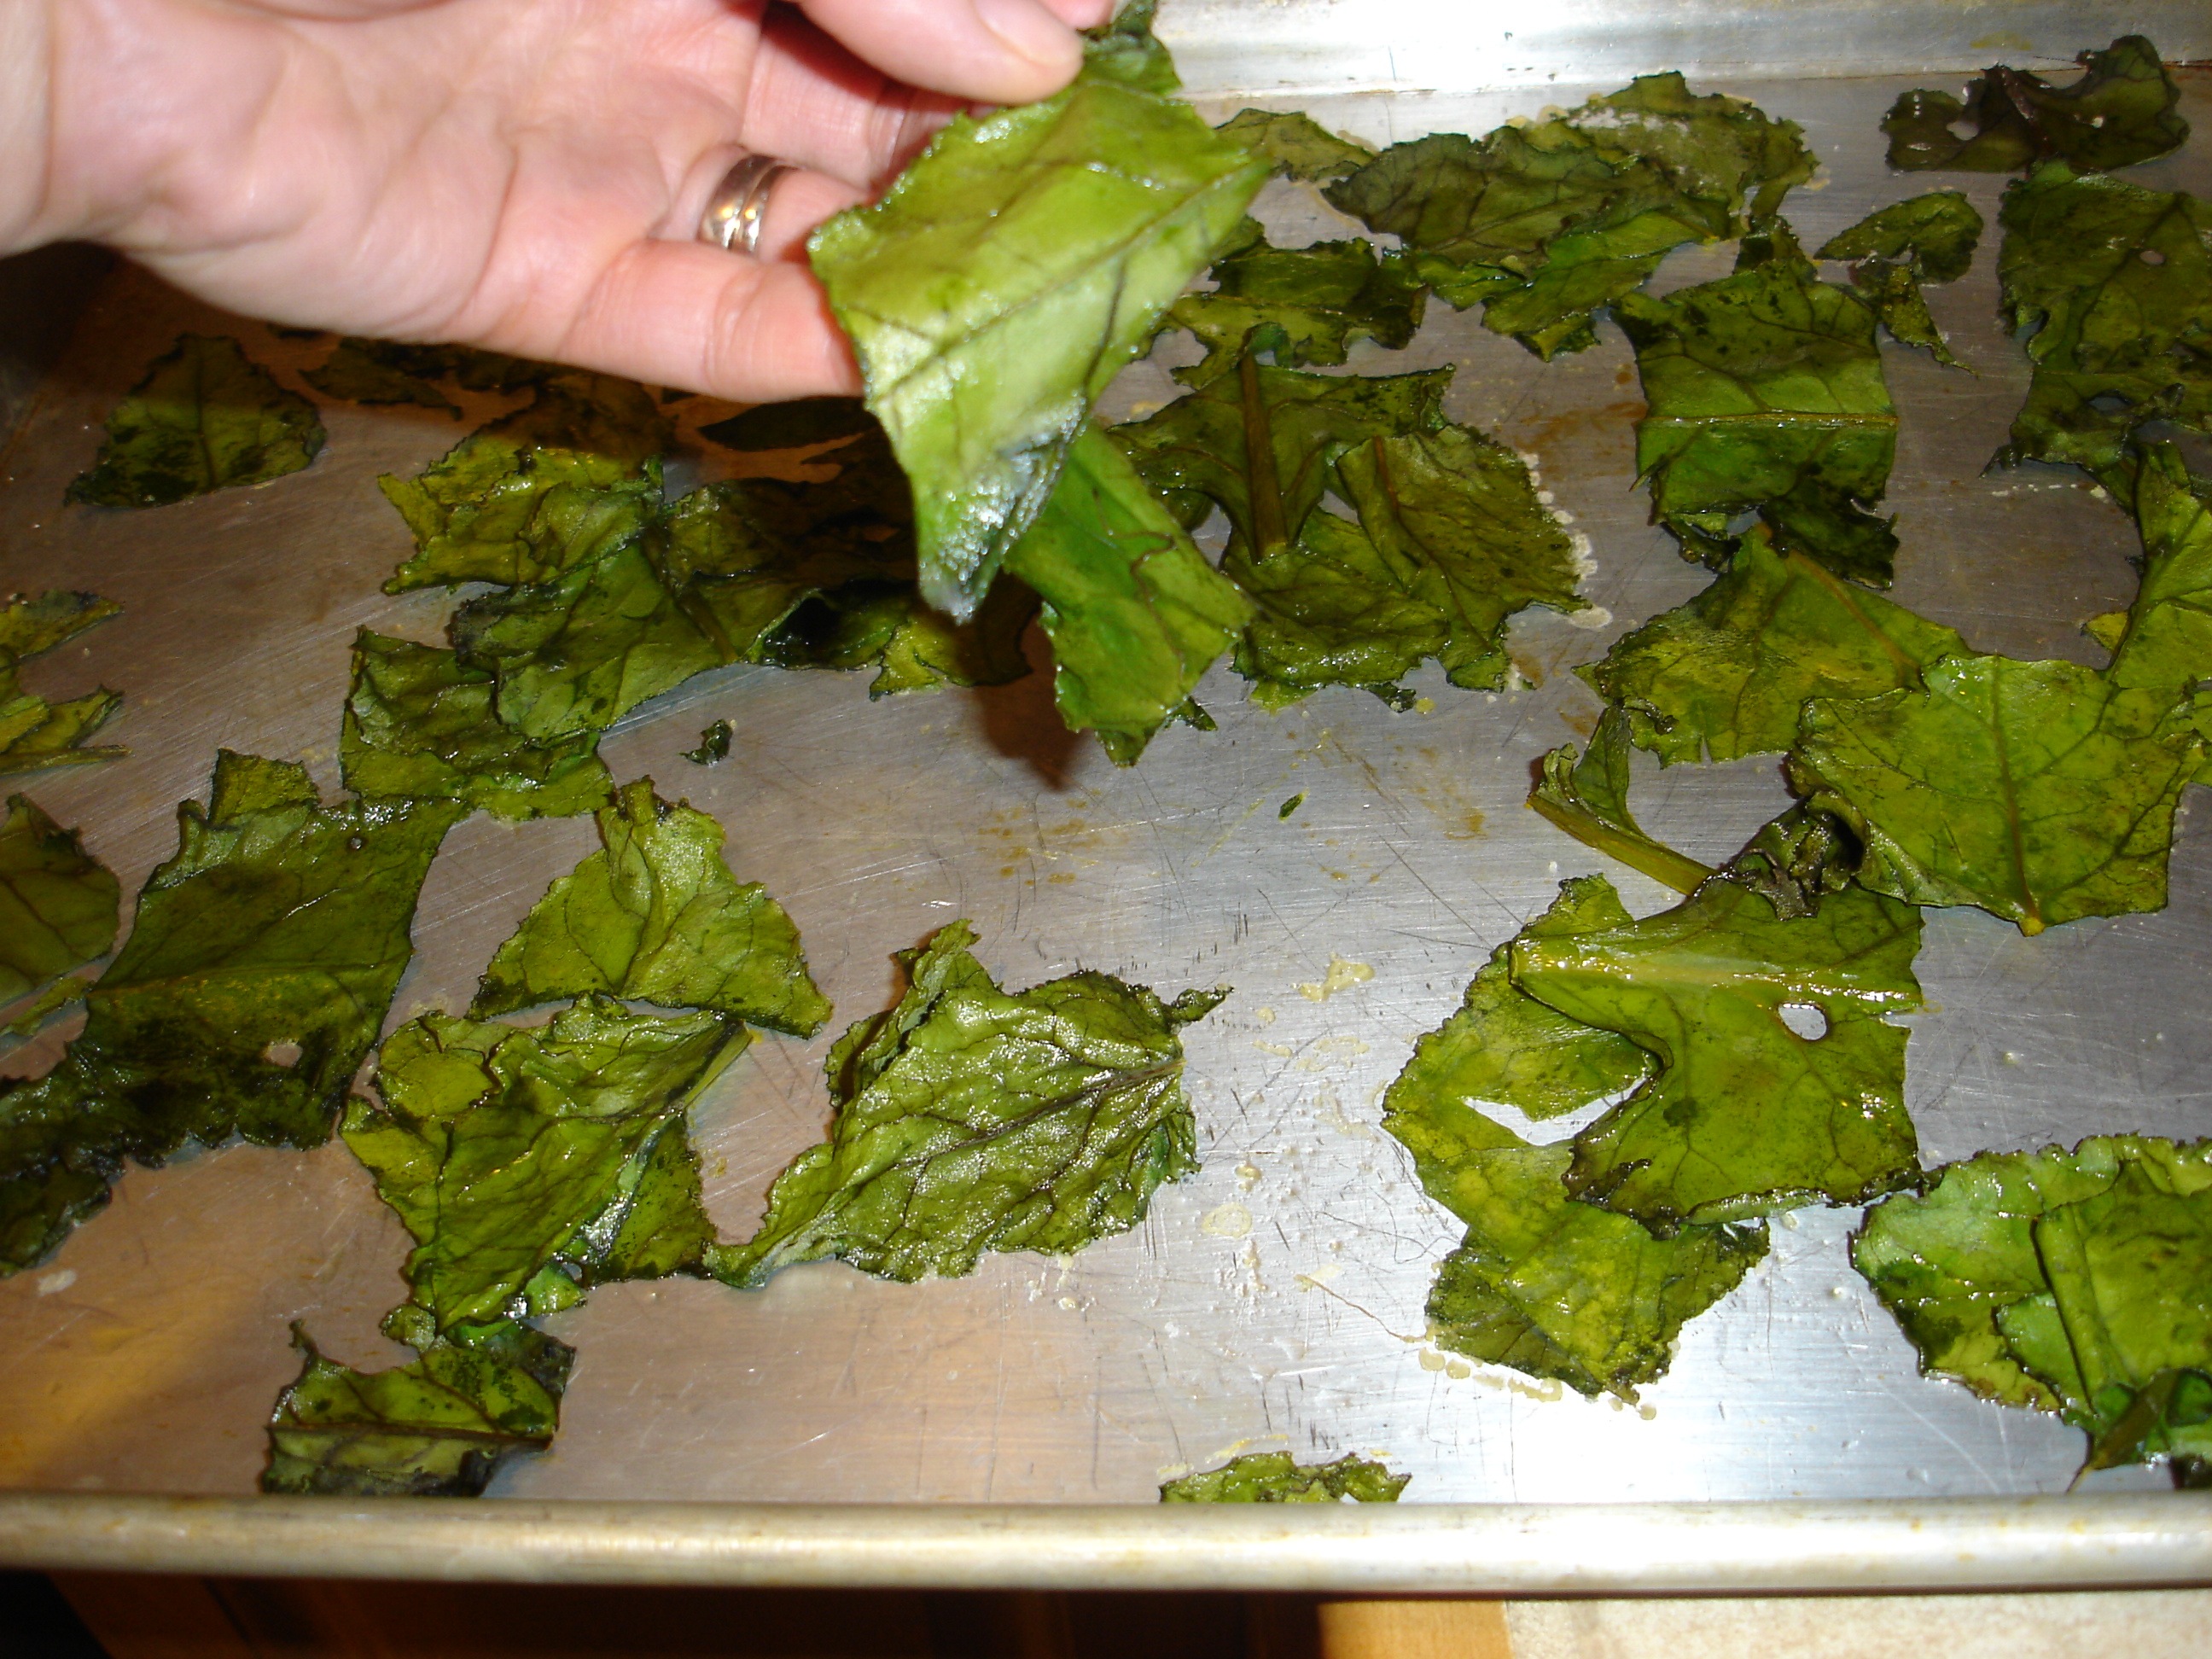
Well, here it is: kale chips are delicious. Beet green chips, not so much.

If you haven’t made them, kale chips are quick, easy, healthy, and crispy. Simply wash a head of kale and pat dry, remove the hard ribs, tear the leaves into bite-sized pieces, set them on a cookie sheet, drizzle with a little olive oil, and sprinkle with a bit of kosher salt or other seasoning of your choice. Slide the cookie sheet into a 300-degree oven for about 15-20 minutes (keep a close eye on your kale), and before you know it, you’ve got kale chips.

Now, I’ll admit that no one in the house cared for these the first few times I made them. They’re crunchy but not sturdy. They’ve got a brittle quality that makes you want to give them a calcium supplement. They get stuck in your teeth. The rest of my family is not interested. The only way I can get my people to willingly eat their kale is by making this potato, kale, and sausage soup.

Boy, aren’t you all just rushing to the market to buy kale for this recipe? But you should. These are worth a try. Several tries. There’s something satisfying about them that I can’t put my finger on, because it’s too busy working in concert with my thumb to pluck kale chips off the cookie sheet.

Now, here’s where I get into trouble. I often get it in my head that if I can make one thing that’s tasty, then I should be able to turn a like item into something that’s even more tasty. So after roasting a batch of beets, I decided to try to make beet green chips as opposed to sauteing the greens.

I realized that something was amiss when my kitchen began to fill with the aroma of what I can only imagine cooked grass clippings would smell like.

There aren’t enough wilted chips in the world, if you ask me. And yes, I tasted them. I lived to tell about it, but just barely.

Which brings me to the whole point of this post: why I can’t quit this blog. I have a love/hate relationship with this blog. I love to share stories; I hate the pressure of trying to come up with new, interesting material. I love it when you tell me that something I’ve written made you laugh or was tasty. I hate feeling like a fraud when I share recipes–I’m not a gourmet cook.

I know, can you believe that? No formal culinary training or nuttin.’

And yet, I persevere. Because you need me. Someday you’ll get it in your head to go rogue in the kitchen, and then you’ll say to yourself, “Wait a minute. I don’t want to pull a Pho Girl.” I am a living, breathing cautionary tale. Who else is going to be honest with you? Who’s not afraid to let what happens in the kitchen out of the kitchen? Pho Girl, that’s who.

Kale Chips

Ingredients:

1 head kale (it cooks down quite a bit; 1 head makes a light snack for 2 or 3 people)

olive oil for drizzling

kosher salt for sprinkling

Directions:

1. Preheat oven to 300 degrees Fahrenheit. Wash the kale and pat dry. Remove the ribs and tear the leaves into bite-sized pieces.

2. Arrange on a cookie sheet and use olive oil and salt to season.

3. Bake for 15-20 minutes, or until kale has cooked down and is crispy to the touch. Remove from oven; cool before serving.

2 Comments

Filed under Uncategorized

Flirting with the Dark Side, Or, My Funny Valentine

His name was Yoda, he was a Jedi… (am I the only one with the melody to “Copacabana” in my head?)

Ah, Valentine’s Day. A reminder that if you’re with someone, you should feel obligated to shower your significant other with love in the form of chocolates, roses, or jewelry. I’m not big on celebrating this holiday with Nacho Man, although I always remember this time of year fondly because Nacho Man proposed around this part of February. And in his true romantic form, he dragged me up a mountain that smelled of urine and was littered with broken glass to do it.

That’s right. I’ll pause while you wipe away your tears of envy, ladies.

Anyway, while Nacho Man and I don’t celebrate Valentine’s Day (that’s right honey, this is a Get Out of Jail card), I love celebrating it with my girls. The flush of color that injects itself into our dreary midwinter weather in the form of valentines, the class parties, handing out cards to friends and neighbors–I love it all.

I especially heart making homemade valentines. Bookmarks used to be my standard go-to, until Lupe begged me to come up with something else. That’s saying something, coming from a book lover like her. So the following year, we made these gnomes, which were so stinkin’ cute that they were worth the time and effort. Lupe reported that several kids still had them on their desks months after Valentine’s Day.

(Note to parents: if you want kids to not eat candy, make the packaging sweeter than the candy.)

The problem is that the following year, I felt the need to outdo myself. If you know me, this isn’t surprising but you’ll roll your eyes anyway. We were inspired by–what else?–a book: The Strange Case of Origami Yoda, by Tom Angleberger. It encapsulates several of Lupe’s interests: Star Wars, paper folding, and a great story.

And Star Wars. In case you missed it the first time.

There are very simple instructions for making an Origami Yoda here. More interested in folding a C-3PO or Darth Vader? You’ll find instructions for those, too. Lupe is constantly folding these: in the car, in her room, at school when she’s bored (ahem). These things would be irresistible even if they were folded out of toilet paper. For Valentine’s Day, Lupe used colored copy paper (I think cardstock might be a little too heavy) and attached Pixy Stix candy as a lightsaber.

So whatever you do this year (and if you’re like me, it’s the weekend before and you still haven’t done anything), good luck.

And may the force be with you.

Sorry.

Leave a comment

Filed under Uncategorized

Cream Puffs, or, The Custard-Filled Carrot That Got My Stepdad to Use Chopsticks

Want to know what goes well, really well, with a bowl of pho?

Honoring European colonialism, I mean, the French influence in Vietnam, with a dessert of cream puffs, which we recently did to celebrate my stepdad’s birthday.

Before he met my mother, my stepdad lived on a farm in rural Washington, rode horses, and watched western movies. Definitely a meat and potatoes kind of guy.

He didn’t know how to use chopsticks. Because a cowboy needs chopsticks “like a fish needs a bicycle,” to quote U2. But this was not my mother’s biggest gripe about him.

No, her biggest complaint was that he bought his pants at Fred Meyer, which is a chain of stores we have in these parts where you can get everything from windshield wipers to ground beef to diamond jewelry.

Not to mention pants.

Obviously, this guy needed to be taught a few things. We left the pants issue to my mom. Meanwhile, one of my cousins took it upon herself to teach my stepdad to use chopsticks.

Breaking into chopstick use with small and/or slippery foods such as rice or noodles is a painful, frustrating, and humiliating manner of prolonging hunger. Only the strongest persevere. A common stereotype is that all Asians are hardworking and disciplined and can succeed in any conditions.

Hello. You’d be all of those things too if you had to depend on two glorified toothpicks to guide your food from your bowl to your mouth.

If you really want to teach someone to use chopsticks, don’t stick a bowl of bland white rice or slick noodles and tofu (protein cubes, my stepdad calls them without affection) in front of a person. Use a large, textured, slow-moving inducement.

Like cream puffs.

On that fateful day, my cousin told my stepdad that he couldn’t have a cream puff until he could pick it up with his chopsticks.

You say sadistic; we say disciplined.

The bottom line is, he figured it out tout de suite.

Cream puffs are made of choux pastry, which only sounds high-falluting and difficult. It’s actually quite easy to make, and just as easy to make gluten-free. I had a great recipe handed down to me from a friend, but it’s buried in the black hole otherwise known as my recipe binder, so I found this one from joyofbaking (not affiliated with the series of books).

I like this recipe. It’s easy. Descriptive. And the weights for ingredients such as flour are provided, which makes it a snap to make this recipe gluten-free.

And because you have to have something to put in them: chocolate whipped cream. My mother fills her cream puffs with homemade custard, which is how I’ll always love them best. I also like to use freshly whipped cream with the zest of one lemon. But Lupe asked for chocolate this time.

Sift 1/8 cup unsweetened cocoa powder with 1/4 cup powdered sugar.

Some bloggers love to brag about the photography equipment they use. Canons and Nikons with paparazzi-quality telephoto lenses and the like. Let me tell you about my envy-inducing equipment: an eleven-year-old Sony digital camera that’s about as sleek as a circa-1995 cell phone. Thank goodness I had my sister to sift the cocoa powder and powdered sugar so I could capture these action shots.

Add the sifted cocoa powder and powdered sugar to 1 cup of whipping cream that you’ve whipped. Throw in a splash of vanilla extract.

Use a fork to split open the cream puffs. Fill away.

Make it snow indoors again.

For the cream puff recipe: joyofbaking

To make it gluten-free, substitute your favorite flour blend by weight. Here’s mine.

Chocolate Whipped Cream

Ingredients:

1 cup heavy whipping cream (half pint)

1/4 cup confectioners or powdered sugar

1/8 cup unsweetened cocoa powder

1/2 teaspoon vanilla

Directions:

1. Chill a large bowl in the freezer.

2. Pour the heavy whipping cream into the bowl and beat on high speed with a standing or handheld mixer until soft peaks form.

3. Add the sifted powdered sugar/cocoa powder and the vanilla extract and mix on low speed until blended. Use a spatula to wipe down the sides of the bowl.

4. Keep chilled until ready to use.

1 Comment

Filed under Uncategorized

Poo Cookies

They were supposed to look like this.

They weren’t supposed to look like this:

It was getting kind of late and I had the house to myself, so I felt inspired to bake. I gotta start ignoring that urge.

It all started with a bag of mint chips, a remnant from our holiday baking. And I thought, “I’ve made those Deep Dark Chocolate Cookies before; I bet they’d be great with mint chips.” I didn’t have enough mint chips, so I added some bittersweet chocolate chips to the bowl and put it in the microwave.

Know what happens when you mix dark brown and mint green?

I don’t think there’s enough olive green chocolate out there.

But at this point, I’m committed. The rest of the batter was in the standing mixer, and it hasn’t got all day. I thought, “Well, maybe this olive green stuff will blend into the chocolate in the batter.”

Know what happens when you add olive green to brown?

Camouflage batter. That’s what. I wish I had a picture of it. But all I could muster was a photo of the mixing bowl afterward:

I have to admit I was kind of in awe of the whole mess. I thought, “Wow. Would you look at that? Camouflage batter.” And then that Brad Paisley song, “Camouflage,” started to play in my head and it’s kind of catchy and I thought, “There’s a whole demographic out there that would love a camouflage dessert.”

And yes, I just admitted that I listen to country music. But really, after what you’re seeing here, you have to agree that my taste in music isn’t my biggest problem.

The next step in the poo cookie-making process is to roll the dough into small balls, and coat them in powdered sugar. Take another opportunity to look at the example.

Here’s what my balls of dough looked like:

Poo cookies.

The dough seeped between my fingers when I tried to roll it into a ball, so I frantically glopped spoonfuls of the stuff onto my baking sheets (one lined with parchment, one without), threw the powdered sugar on top, and shoved them into the oven.

Even when all evidence points to the contrary, I often have this hope that something magical will happen in the oven. Sort of a, “Here, I messed this up. You make it work” attitude.

The cookies on the parchment shaped up okay. As you can see in the photo at the beginning of this post, the cookies on the baking sheet coated in cooking spray did not.

I can’t say that I blame them. Would you do anything nice for me if I called you poo?

These cookies–when made correctly–are divine–gooey, fudgy, decadent. They contain no butter or flour. You’ll probably have great success with them if you follow the Pho Girl Method (aka The Learn from My Mistakes Method):

1. Don’t bake late at night if you’re not fresh late  at night.

2. Don’t make substitutions simply because you want to clean out the pantry. What works for soups and casseroles does not work for cookies.

3. Do make sure the egg whites are stiff enough before you add the powdered sugar, and then make sure the egg whites-powdered sugar mixture is stiff enough (the original recipe says it should resemble marshmallow fluff). In other words, Don’t rush the process once you’ve started. (See Point 1 for why I rushed the process.)

4. Do make sure the melted chocolate chips have cooled enough before you add them to the batter.

5. Do use the powdered sugar sparingly when you’re coating the dough balls, or you’ll feel your blood sugar skyrocket after the first bite.

6. Do not call your food poo. It becomes a self-fulfilling prophecy.

7. And here’s the biggest Don’t, which I think should qualify for Resolution #4: Don’t stand over the pan, weeping and eating poo cookies because you’re desperate for chocolate and heartbroken that you’ve wasted the ingredients.

That’s just sad.

Which might make for a darn good country song.

2 Comments

Filed under Uncategorized

Root Beer Floats

This one’s for Nacho Man.

It actually was, for his birthday.

Nacho Man will, on very rare occasions, unexpectedly come home from work with vanilla ice cream and a bottle of root beer, and whip up his signature dessert. Afterward, he will wipe his brow as though he just catered a party for 200, but chances are I don’t care because it’s hot but I’ve got something to keep me cool.

So for his most recent birthday, I decided to do the hard work and treat him. At least that’s what I told him. Because it sounded so much more thoughtful than, “I spent all my spare time reading a novel and ran out of time to bake.”

Looks pretty good to me. Except that when I examined my profile photos of the finished product, I realized that the glass was less than half full. This is not necessarily the sort of thing you realize when you’re looking at something with your eye.

One point for the camera.

Now we don’t need to be having heaping glasses of root beer floats, on account of this nacho thing we’re kind of into, so my solution:

This time, with chocolate shavings.

Hmm. This time the camera is showing me that my vanilla ice cream looks like cubed potato.

Nacho Man could care less about the type of vessel we use to serve a root beer float. I could present it in a plant pot and he’d say, “Thank you.” Which is kind of nice, when you think about it in the abstract.

But only in the abstract.

For me, putting dessert in a long-stemmed wine glass or champagne flute makes it feel grown up and sophisticated, enjoyed by the kinds of folks who eat polite-sized portions and don’t scrape out the inside of the bowl or cup like they’re scaling a fish.

Which might have to become Resolution #3.

Root Beer Floats

Ingredients:

vanilla ice cream

root beer

whipped cream (we like Reddi Wip for these)

maraschino cherries (optional)

chocolate shavings (optional)

Directions:

Put 1 scoop ice cream in a glass. Add root beer. Top with whipped cream and cherries or chocolate shavings if desired.


Leave a comment

Filed under Uncategorized

Roasted Garlic Soup, Or, The Passive-Aggressive Approach to Being Left Alone

I have a friend from my former job.

Just one.

Not really. I had more than one.

Anyway, we used to joke that Pacific Northwesterners are about the most passive-aggressive group of people you’ll ever meet. In other words, we’re painfully indirect, we never say what we mean, we sigh and shake our heads and complain behind someone’s back rather than confront them about what’s bothering us, and we have a million little ways of showing you know that something’s not okay even when we say it is.

I don’t know why we do this. The group shrug. Maybe it’s rain-induced. A vitamin D deficiency.

But hopefully we all have a few people that we can be painfully honest with, people with whom it’s safe to say what you feel. For me, Nacho Man is one of those lucky people. Take, for example, this recent exchange.

“What’s this?” Nacho Man asked, peering at something in the refrigerator.

“Garlic soup,” I declared forthrightly.

“Hmm,” he said as he closed the door. “Sounds interesting.”

Do you see what he just did?

But that’s his loss. This soup is wonderful. And it’s just the meal for you if:

1. You’re a busy mom with kids hanging on you all day and you don’t have it in you to tell your significant other, “Not tonight, honey.” It’s a safe word you don’t even have to say;

2. You’re so into Twilight that you’re casting paranoid–I mean rightfully suspicious–glances at your neighbors;

3. You’ve ever stared at a pantry that’s barren except for garlic, onions, and chicken stock and walked away, defeated;

4. You love love love garlic.

Check out the recipe at smitten kitchen, then whip up a batch and savor it for lunch for a few days. This soup is warm, earthy, and garlicky without being in your face.

It’s passive-aggressive that way.

Leave a comment

Filed under Uncategorized

Gluten-Free Cheese Crackers, Or, Your Cats’ New Favorite Treat

Resolution #2: find ultimate fulfillment as happy homemaker by baking tasty kitty num-num.

Your family will love them, too. We had to hide ours because the cats were trying to eat through the plastic wrap to get to them.

Or what was left of them, as Nacho Man and the girls kept sneaking into the kitchen to swipe them from the baking sheet.

Lupe does a pretty impressive job of avoiding foods that contain gluten, unless it’s the holidays, in which case she has about as much will power as the rest of us. But now that those days are behind us, she’s trying to clean out her system.

Unless there are cheese crackers within a five-mile radius of her. She finds those irresistible year-round. Cheez-Its, Goldfish, you name it.

Like nearly every other woman in America, I spend a fair amount of time browsing a website called pinterest. (Please stop rolling your eyes, Nacho Man.) There are lots of interesting ideas, just as many pointless ones, and plenty of shirtless photos of The Two Ryans: Gosling and Reynolds. What fascinates me about pinterest (aside from the fact that you’ve got photos of heart-clogging recipes next to photos of thin, toned, and tan women that are the inspiration for weight-loss plans) is that it’s fueled predominantly by women.

Way to go, ladies.

I saw this recipe for homemade cheese crackers there, which was actually taken from someone else’s recipe, and so on. That’s life on the Internet.

Make the recipe just as it is and send them in school lunches or serve them after school. It’s awesome. And you can pronounce every ingredient which, unless you have an advanced science degree, generally isn’t possible when you read the side of a box of processed food. If you want to make the recipe gluten-free, substitute the weight equivalent of your favorite gluten-free flour (in my case, 4 5/8 ounces of this flour). Want to dress these up? Try a different sharp, dry cheese or add garlic powder or some chopped chives or rosemary.

Gluten-Free Cheese Crackers (adapted from New Nostalgia)

Ingredients:

weight equivalent of 1 cup of wheat flour

1 cup shredded sharp cheddar cheese

4 tablespoons cold butter, cut into pieces

3/4 teaspoon kosher salt

pinch of cayenne (original recipe calls for 1/4 teaspoon, which was a little too spicy for the girls)

water

Directions:

1. Put the flour, cheese, butter, and spices in a food processor and pulse until it resembles fine crumbs.

2. Add water, 1 tablespoon at a time, until the dough comes together. (For me, about 2 1/2 or 3 tablespoons)

3. Wrap dough in plastic and freeze for 30 minutes.

4. Preheat oven to 350 degrees F. Line baking sheet with parchment paper.

5. Roll dough to 1/4 inch thickness (the original recipe says 1/8 inch but I didn’t have the patience or arm strength for that, and the family loved the thicker crackers anyway) between 2 pieces of plastic, then transfer to baking sheet. Sprinkle with a little kosher or sea salt, if desired.

6. Use a pizza cutter or sharp knife to cut dough into 1-inch squares–they will still be touching. Bake approximately 25 minutes, then check for browning and crisping. I separate the crackers with a spatula at this point. Continue baking until crackers have browned and crisped to your liking. Remove from oven and cool on baking sheets, then transfer to airtight containers. These are best the day you bake them, but I’ve found that my people and felines are happy to tolerate them for a day or two after that.

4 Comments

Filed under Uncategorized

Momo’s Cookie Butter Blossoms

One resolution for 2012: spend quality time with people who are risk-takers in the kitchen. Just not the knife-throwing kind.

For me, that person is my sister. Momo, as she’s affectionately known by my girls, is a brilliant baker, and the rest of us are just lucky enough to be in the right place at the right time to sample her divine creations.

And clean up after her. Have I mentioned she’s also an F5 tornado blazing through the kitchen?

How brilliant is she? Well, to give you an example, there’s pretty much nothing more perfect than a Peanut Blossom cookie–that peanut butter cookie topped with a Hershey’s Kiss. It’s great and you don’t mess with greatness…unless you’re Momo and you get it in your head to swap out the peanut butter for Trader Joe’s Cookie Butter.

Do you know about Cookie Butter? I didn’t, until Momo enlightened me. It’s a spread made of speculoos, a type of shortbread cookie that’s a winter holiday treat in parts of Europe, sugars, oils, and other stuff that tastes good but is bad for you.

That this stuff isn’t gluten-free is the least of its sins. Doesn’t matter. With every bite, it moves higher on my list of favorite forbidden foods.

When you open a jar of this Naughty/Nice stuff, you’re hit with the aroma of something faintly gingerbready and warm. It’s delicious on bread, apples, the tip of your finger, you name it. And apparently it’s seasonal, which means I should have blogged this during the holidays, but my fingers were covered in Cookie Butter.

Thanks, Momo, for turning me into the Cookie Butter Monster.

Momo the Cookie Alchemist came up with the idea to replace the peanut butter with Cookie Butter (which shall always be capitalized because it deserves it) in the Peanut Blossom recipe. What I love about baking with Momo is that she doesn’t overthink it. She just goes for it. Where I would have weighed 1 cup of peanut butter and replaced it with the equivalent weight of cookie butter, she just dumped 1 cup of it into the batter.

Let go of your hand-wringing and gut-wrenching inhibitions or get out of her way.

Did I mention that she’s an F5 tornado in the kitchen?

So we went with it. And we’ll never go back.

Cookie Butter Blossoms are soft and chewy and spicy. They have a vaguely snickerdoodley taste.

They make you want to dash to Trader Joe’s after a Zumba class and buy up what’s left of the Cookie Butter…not that I did that. I’m just saying.

We don’t keep our Chistmas decorations up year-round, we don’t listen to Christmas music in July, and we don’t buy any holiday stuff when it first hits the market because those shelves represent consumerism and corporate greed.

Besides, if you wait until three days before the holiday, you can get everything for eighty percent off. Or so.

My point is that I don’t need to have this stuff in my face every day. As a reward, I would like to see Cookie Butter on the store shelves at all times so I can have my face in a jar of Cookie Butter at all times.

Trader Joe’s Cookie Butter Blossoms

(basically this Peanut Blossoms recipe by Rosemarie Magee, with Cookie Butter substituted)

Ingredients:

1 cup shortening (for Momo, nothing beats a loaf of butter-flavored Crisc0)

1 cup Cookie Butter

1 cup packed brown sugar

1 cup white sugar

2 extra-large eggs

1/4 cup milk

2 teaspoons vanilla extract

3 1/2 cups all-purpose flour

2 teaspoons baking soda

1 teaspoon salt

1/2 cup white sugar (Turbinado sugar would also be nice here)

2 9-ounce bags of milk chocolate Hershey’s Kisses, wrappers removed

Directions:

1. Preheat oven to 375 degrees F.

2. Use a mixer to cream the shortening, Cookie Butter, brown sugar, and 1 cup white sugar until well incorporated. Add the eggs one at a time, mixing until thoroughly combined.

3. Sift the floor, baking soda, and salt, and add to the Cookie Butter mixture, blending well.

4. Use a tablespoon to scoop out dough, roll into a ball, and roll in the 1/2 cup of white sugar or Turbinado sugar. Place on cookie sheet about 3 inches apart.

5. Bake 10-12 minutes. Remove from oven and gently press a chocolate kiss into the center of each cookie while still hot. Cool on wire racks.

3 Comments

Filed under Uncategorized

Meatloaf Cake, Or, When Cooks Go Smug

So it was 4:30 on a Sunday afternoon and I was blasting through Amy Green‘s Simply Sugar and Gluten-Free cookbook, looking for something quick and easy. I came across a recipe for Apple Carrot Breakfast Cake and as I skimmed the ingredients list and instructions, I thought to myself, “I can do this nooooo problem.” I love having quick breads for Lupe to take to school for her mid-morning snack and this recipe looked similar enough to my muffin recipe that I felt confident.

Maybe too confident.

Too confident to read the instructions carefully. Especially the line about putting the apples and carrots and a few other ingredients into a blender or food processor.

Warning: the following image is graphic, horrific, disturbing, offensive, wrong, and unfortunate.

The saddest thing, aside from the senseless, wanton waste of apples and carrots and expensive gluten-free flours? I actually scoffed as I dumped chunks of carrots and apples into the batter. I thought, “There’s no way this is going to work. What is this author thinking? Ha. I’ll show her how wrong this recipe is when I make it and it doesn’t turn out.”

That’s right. I knew it wouldn’t work. What’s more, I didn’t want it to so I could feel superior to a published cookbook author. I laughed maniacally at my own genius, then took a closer look at the recipe.

And caught the bit about blending the apples and carrots to smithereens.

Oh, dang.

Thoroughly chastened, I gave it another go.

Ta da.

I took a moment to reflect as I bit into this cake. Here are the highlights:

a. Don’t ever assume that you’re smarter than you actually are.

b. Assume that you’re smarter than you think you are. If you think it doesn’t make sense to drop stew-sized wedges of carrot and apple into a cake batter, then listen to your gut.

c. Don’t try to be superior to others. We are all students.

d. Read instructions slowly and carefully. What’s applicable to everything from the SATs to prescription medication is good for recipes.

e. If at first you don’t succeed, laugh it off and try again. The old me would have hidden the evidence in the compost bin, but I’d like to think that I’m evolving. Plus I know that you tens of you get a bigger kick out of my food bloopers than my actual recipes. So I’m playing to my crowd.

And so, adapted from Amy Green’s recipe, which she adapted from a blender manual, is…

Apple Carrot Breakfast Cake

9 servings

Ingredients:

2 cups gluten-free flour

1/4 cup agave (or 1/2 cup sugar)

2 teaspoons baking soda

2 teaspoons ground cinnamon

1/2 teaspoon ground nutmeg

1/2 teaspoon kosher salt

3 extra-large eggs

1 teaspoon vanilla extract

2 apples, cut into wedges

3 medium carrots, washed well and chopped

1/4 cup chopped walnuts (optional)

Directions:

1. Preheat oven to 350 degrees F. Coat an 8 x 8 inch glass baking pan with nonstick spray.

2. Whisk flour, baking soda, cinnamon, nutmeg, and salt in a large bowl.

3. Place eggs, carrots, apples, vanilla, and agave in a blender or food processor. Blend or process until you have a smooth mixture, scraping down sides of container as needed.

4. Add the wet ingredients to the dry and mix until combined. Add walnuts if using. Pour into the cake pan and bake about 25-30 minutes, or until a cake tester inserted in the middle of the pan comes out clean. Allow to cool completely in the pan.

2 Comments

Filed under Uncategorized